The Savvy Teacher’s Digital Tool Kit:<br/> Screen Capture Programs
By Alix E. Peshette
Cross-posted from EdTech Gold Rush
Many educators create their own instructional materials. The reasons can range from a textbook that is above the reading level of English Language Learners and Special Education students to instructional materials that are so out of date that they are irrelevant. In California, the textbook adoption cycle is every seven years per subject area. A lot can change in seven years!
The web is a tremendous resource for teachers. One can pluck articles from blogs, grab photographs from websites, download video and harvest clip art from endless sources. Creating instructional materials from online resources becomes a lot easier when there are good screen capture programs in the digital toolbox. While there is a place for print media in the curriculum, use of video and imagery is becoming more common in the classroom. A screen capture program needs to address a variety of media.
Let’s start at the low-tech and Freeware end and work up to the Web 2.0 tools.
OK, for strictly print media capture there is always the Print Screen key on the keyboard. Click it and capture a screen shot of – well, the entire screen. Usually that’s more than is needed, so editing is the next step. For a graphic editing program with some nice features try (Freeware) PhotoFiltre 6. It’s a decent little program with lots of special effects and masks. It only lacks the ability to do layers, which the licensed version PhotoFiltre Studio will do. (PC only)
A past favorite of mine is the screen capture program PrintKey 2000. It’s freeware (PC only) and will capture regions, swap colors, convert to grayscale or black and white, change picture size and send to the printer. It’s a very small program that sits in the system tray and is activated by clicking the Print Screen key. Click here to download a .pdf tutorial on PrintKey 2000.
Moving up the technology food chain brings us to CamStudio. This program can record all screen and audio activity, create AVI files and convert them to SWF Streaming Flash videos. It is low-tech enough to be very user friendly, yet gets the job done. It is free and is licensed under the GNU General Public License criteria.
Several steps up in sophistication is SnagIt. It can capture regions, scrolling window screens, menus and even create video shots of screen actions for tutorials. TechSmith sells it for $39.95, but has an educator discount of $29.95. Among the many features are the free upgrades and the free SnagIt accessories and tools. My favorite is the stamps, which includes cursors, arrows, numbers, symbols and clip art in color or black and white and in several sizes. Select a stamp, left-click, place it on the screen capture and drag it into place.
In the Web 2.0 arena, Jing Project is getting a lot of notice. Made by TechSmith, Jing is sort of a hybrid of software and content that is hosted online. It runs on both PC and Mac. Jing developers explain it as:
 The Jing capture icon hangs off the edges of an active window. Be sure to set up the file destination and format in advance by clicking on the “More” icon to get to the settings.
 To capture, click the capture icon, then left-click twice to define the area. Select the image or video icons. Click the image icon to bring up a work area with arrow, highlighter, frame, text and color tools. Click the video icon and Jing starts up a video recording area, ready to record the screen and audio. Click the Share icon to upload to Screencast.com. Click File to save locally.
Having presentations hosted online provides a great way for people to share their resources from any computer in the world. The captured content can also be downloaded to a local computer. One downside right now is that video capture is saved as .swf files. This is problematic for educators who may want to edit the files. However, the Jing development team is very open to conversations with users about the features.
Ript is another new program and offers a whimsical interpretation of the “screen capture” concept.
Check out the Ript Help page to see how Ript works and what it can and can’t do.
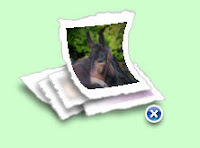
Capturing with Ript involves left clicking or highlighting images, links, or text and dragging the item on top of the Ript icon. A ripping sound confirms that the item is now saved.
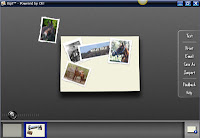 Left-double click on the Ript icon to open up a small graphics program called the table top, that mimics a blank page in a scrapbook. Move, rotate, resize and order the saved captures to compose the page. Use the text tool to add comments, titles and annotations.
Save the page as a .jpeg or Ript project file.

The finished page can also be printed or emailed. Ript is great fun and has some intriguing possibilities in the graphic arts area. It could be used for creating yearbook pages, greeting cards, signs and labels.
Some Last Thoughts on Screen Captures
Remember to check for copyright and terms of use, be aware of the intellectual property rights of others and cite those sources.
Cross-posted from EdTech Gold Rush
Many educators create their own instructional materials. The reasons can range from a textbook that is above the reading level of English Language Learners and Special Education students to instructional materials that are so out of date that they are irrelevant. In California, the textbook adoption cycle is every seven years per subject area. A lot can change in seven years!
The web is a tremendous resource for teachers. One can pluck articles from blogs, grab photographs from websites, download video and harvest clip art from endless sources. Creating instructional materials from online resources becomes a lot easier when there are good screen capture programs in the digital toolbox. While there is a place for print media in the curriculum, use of video and imagery is becoming more common in the classroom. A screen capture program needs to address a variety of media.
Let’s start at the low-tech and Freeware end and work up to the Web 2.0 tools.
OK, for strictly print media capture there is always the Print Screen key on the keyboard. Click it and capture a screen shot of – well, the entire screen. Usually that’s more than is needed, so editing is the next step. For a graphic editing program with some nice features try (Freeware) PhotoFiltre 6. It’s a decent little program with lots of special effects and masks. It only lacks the ability to do layers, which the licensed version PhotoFiltre Studio will do. (PC only)
A past favorite of mine is the screen capture program PrintKey 2000. It’s freeware (PC only) and will capture regions, swap colors, convert to grayscale or black and white, change picture size and send to the printer. It’s a very small program that sits in the system tray and is activated by clicking the Print Screen key. Click here to download a .pdf tutorial on PrintKey 2000.
Moving up the technology food chain brings us to CamStudio. This program can record all screen and audio activity, create AVI files and convert them to SWF Streaming Flash videos. It is low-tech enough to be very user friendly, yet gets the job done. It is free and is licensed under the GNU General Public License criteria.
Several steps up in sophistication is SnagIt. It can capture regions, scrolling window screens, menus and even create video shots of screen actions for tutorials. TechSmith sells it for $39.95, but has an educator discount of $29.95. Among the many features are the free upgrades and the free SnagIt accessories and tools. My favorite is the stamps, which includes cursors, arrows, numbers, symbols and clip art in color or black and white and in several sizes. Select a stamp, left-click, place it on the screen capture and drag it into place.
In the Web 2.0 arena, Jing Project is getting a lot of notice. Made by TechSmith, Jing is sort of a hybrid of software and content that is hosted online. It runs on both PC and Mac. Jing developers explain it as:
“Think of Jing as a supplement to all your chat discussions, email threads, forum posts and blog entries. It sits nicely on your desktop, ready to capture and share your stuff at a moment’s notice. Simply select an area of your screen, capture it as an image or record it as a video, and then click Share. Jing conveniently places a URL to your content on your clipboard ready for you to paste the URL into any of your conversations.” “Your content is hosted on Screencast.com, for which we are providing a complimentary account to all participants during this project. Users have 200MB of space for storing screenshots and screencasts and 1 GB of bandwidth that renews monthly. The Screencast.com account will remain available to you for the duration of the project.”
 The Jing capture icon hangs off the edges of an active window. Be sure to set up the file destination and format in advance by clicking on the “More” icon to get to the settings.
 To capture, click the capture icon, then left-click twice to define the area. Select the image or video icons. Click the image icon to bring up a work area with arrow, highlighter, frame, text and color tools. Click the video icon and Jing starts up a video recording area, ready to record the screen and audio. Click the Share icon to upload to Screencast.com. Click File to save locally.
Having presentations hosted online provides a great way for people to share their resources from any computer in the world. The captured content can also be downloaded to a local computer. One downside right now is that video capture is saved as .swf files. This is problematic for educators who may want to edit the files. However, the Jing development team is very open to conversations with users about the features.
Ript is another new program and offers a whimsical interpretation of the “screen capture” concept.
“Part scrapbook, part “to-do” list (or to-buy list), Ript mimics the actions of ripping, piling and arranging scraps of information. If you can see it on your computer, you can “rip” it. Simply drag and drop images and text from the internet or your computer and arrange them however you please — making it easy to compile, print and share your handiwork.”
Check out the Ript Help page to see how Ript works and what it can and can’t do.

Capturing with Ript involves left clicking or highlighting images, links, or text and dragging the item on top of the Ript icon. A ripping sound confirms that the item is now saved.
 Left-double click on the Ript icon to open up a small graphics program called the table top, that mimics a blank page in a scrapbook. Move, rotate, resize and order the saved captures to compose the page. Use the text tool to add comments, titles and annotations.
Save the page as a .jpeg or Ript project file.

The finished page can also be printed or emailed. Ript is great fun and has some intriguing possibilities in the graphic arts area. It could be used for creating yearbook pages, greeting cards, signs and labels.
Some Last Thoughts on Screen Captures
Remember to check for copyright and terms of use, be aware of the intellectual property rights of others and cite those sources.
-
Comment by Jason de Nys on February 21, 2008 at 9:08pm
-
Don't forget that Interactive whiteboard software also comes with screen capture capabilities. We have Promethean boards and the recording tool in the ActivStudio software is pretty easy to use and saves as an .avi. The camera tool is very convenient for in-class use.
-
-
Another one is www.freescreencast.com which I have started trying out. It integrates the recording and the uploading really well. You've prompted me to write a post about it on my *plug* blog www.teachr20.blogspot.com
-
Comment by Alix E. Peshette on February 22, 2008 at 10:23am
-
Jason,
Thanks for the comments about Smart boards and the screen capture abilities. Some districts, such as mine, haven't invested heavily in Smart boards. We are looking more to Web 2.0 applications to fill in the software/hardware blanks in our curriculum. Thanks for mentioning Freescreencast.com. That's just the kind of Web 2.0 resource that gives teachers more options beyond locally installed software.
-
Comment by Kate on February 27, 2008 at 4:49am
-
i use another cool prog its Screen VidShot!
i found it more helpful and simple than all another(i tyed enought)
here you can download demo without timelimit and find more info! http://www.geovid.com/Screen_VidShot/
GLuck!
Comment
Report
Win at School
Commercial Policy
If you are representing a commercial entity, please see the specific guidelines on your participation.
Badge
Follow
Awards:
© 2024 Created by Steve Hargadon.
Powered by
![]()
You need to be a member of Classroom 2.0 to add comments!
Join Classroom 2.0